Website Deployment
Fork the repository and configure GitHub to publish your website
This chapter will guide you through the deployment of your Moire website, including Forking the repository, enabling Actions, configuring Pages, and generating a Token.
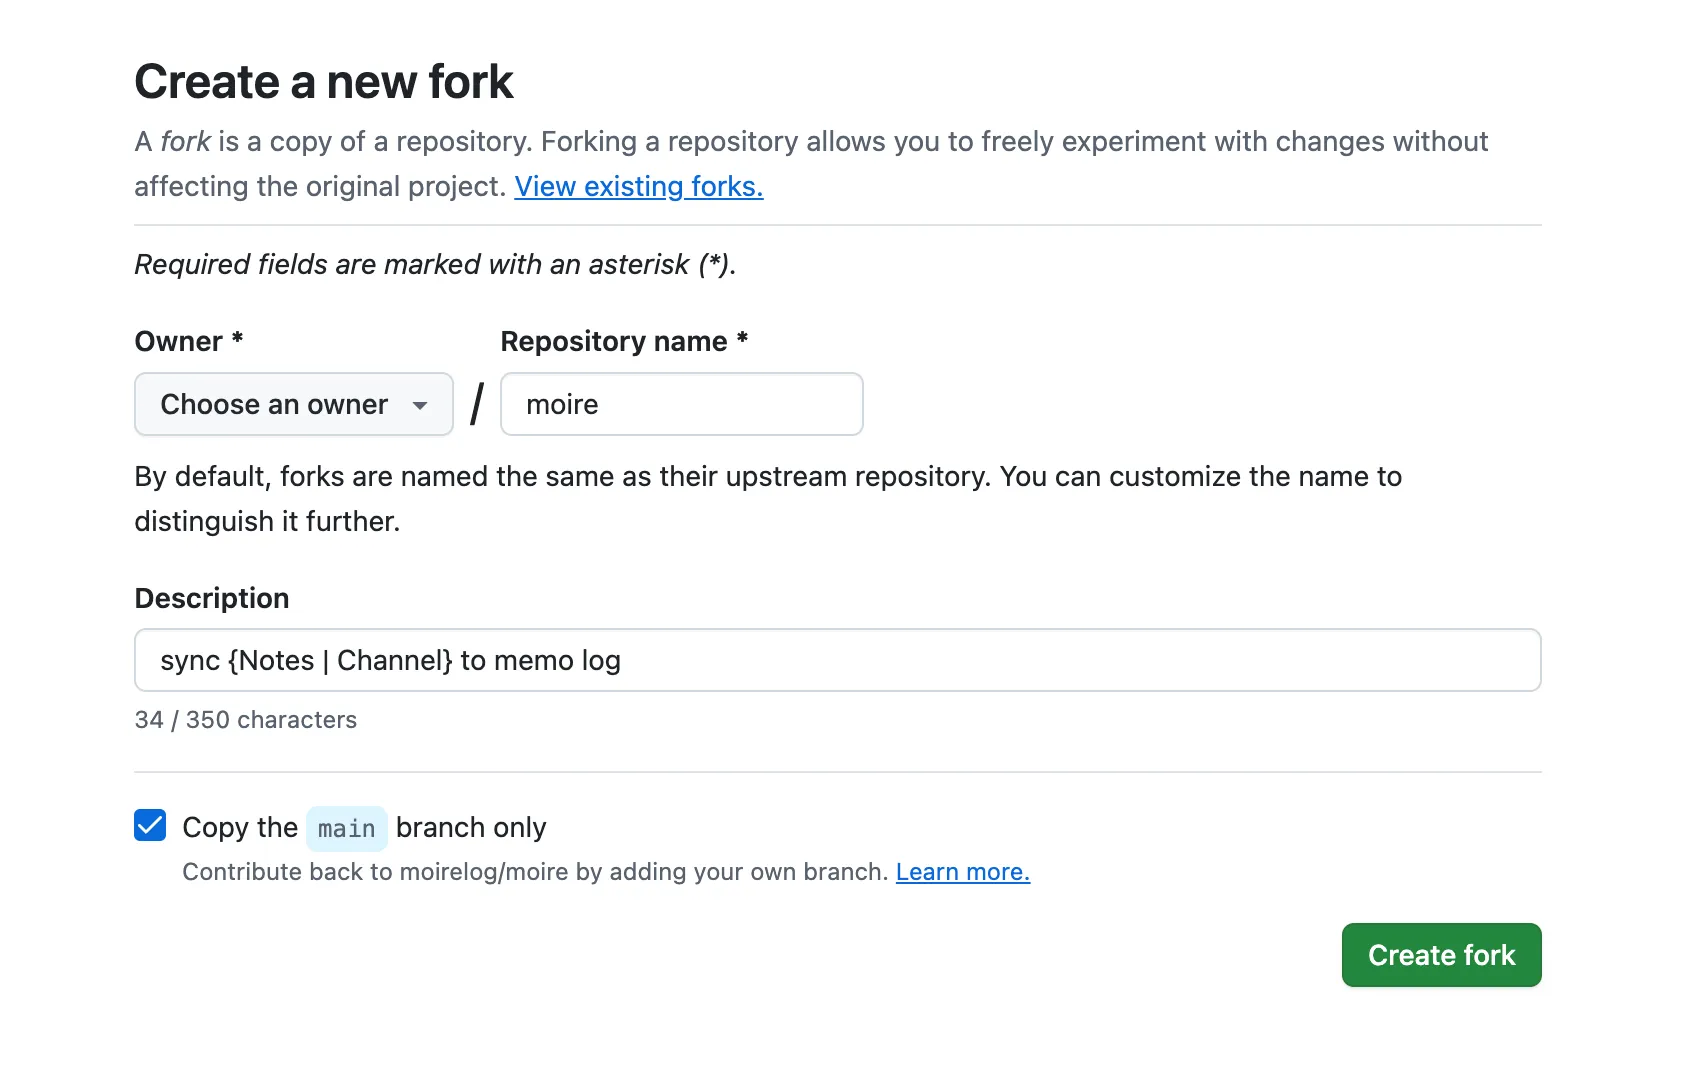
Step 1: Fork the Repository
Section titled “Step 1: Fork the Repository”-
Open the Moire Repository
-
Click the Fork button in the top right corner
-
Click Create fork
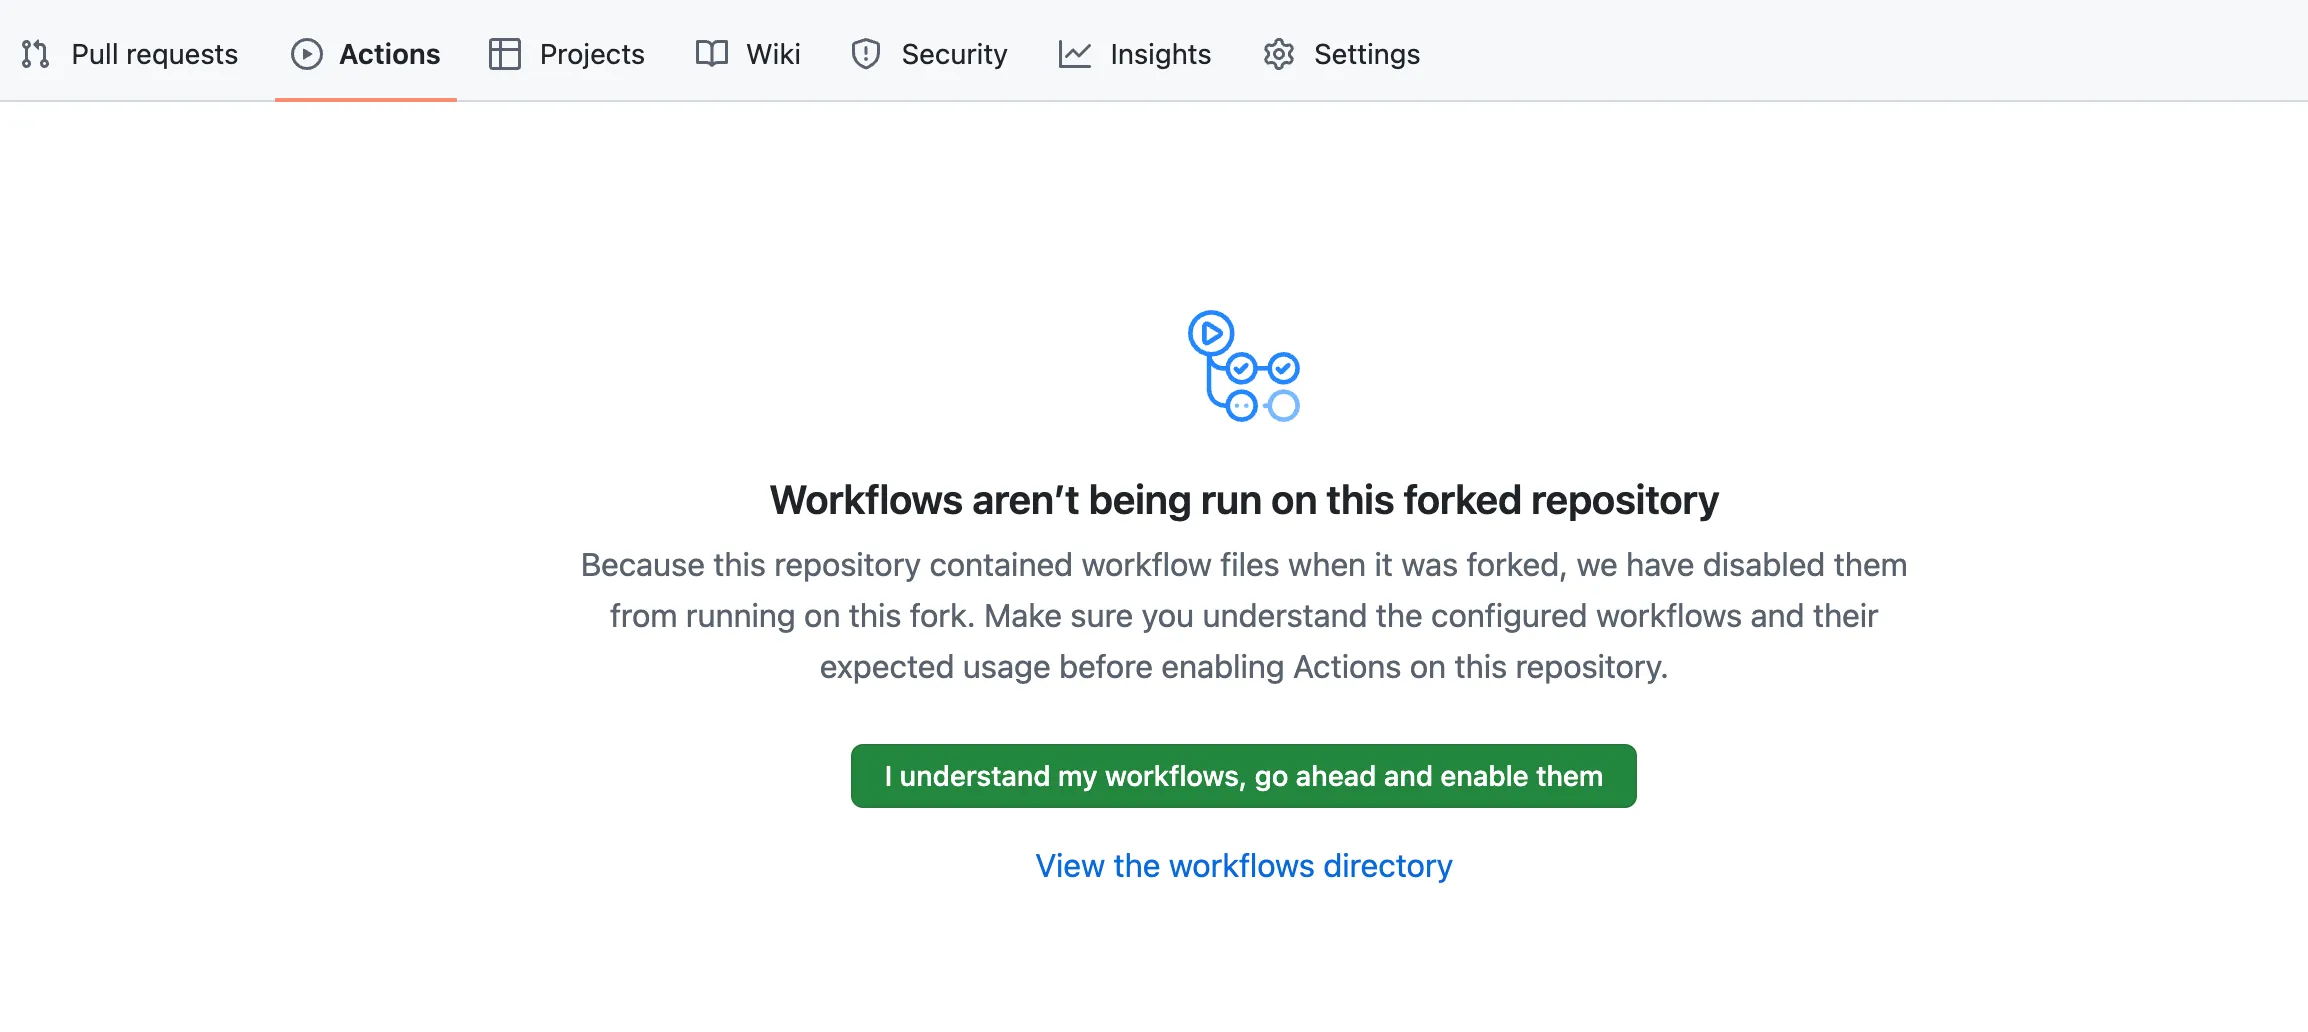
Step 2: Enable Actions
Section titled “Step 2: Enable Actions”-
Go to your Forked repository
-
Click the Actions tab at the top
-
Click the green button: I understand my workflows, go ahead and enable them
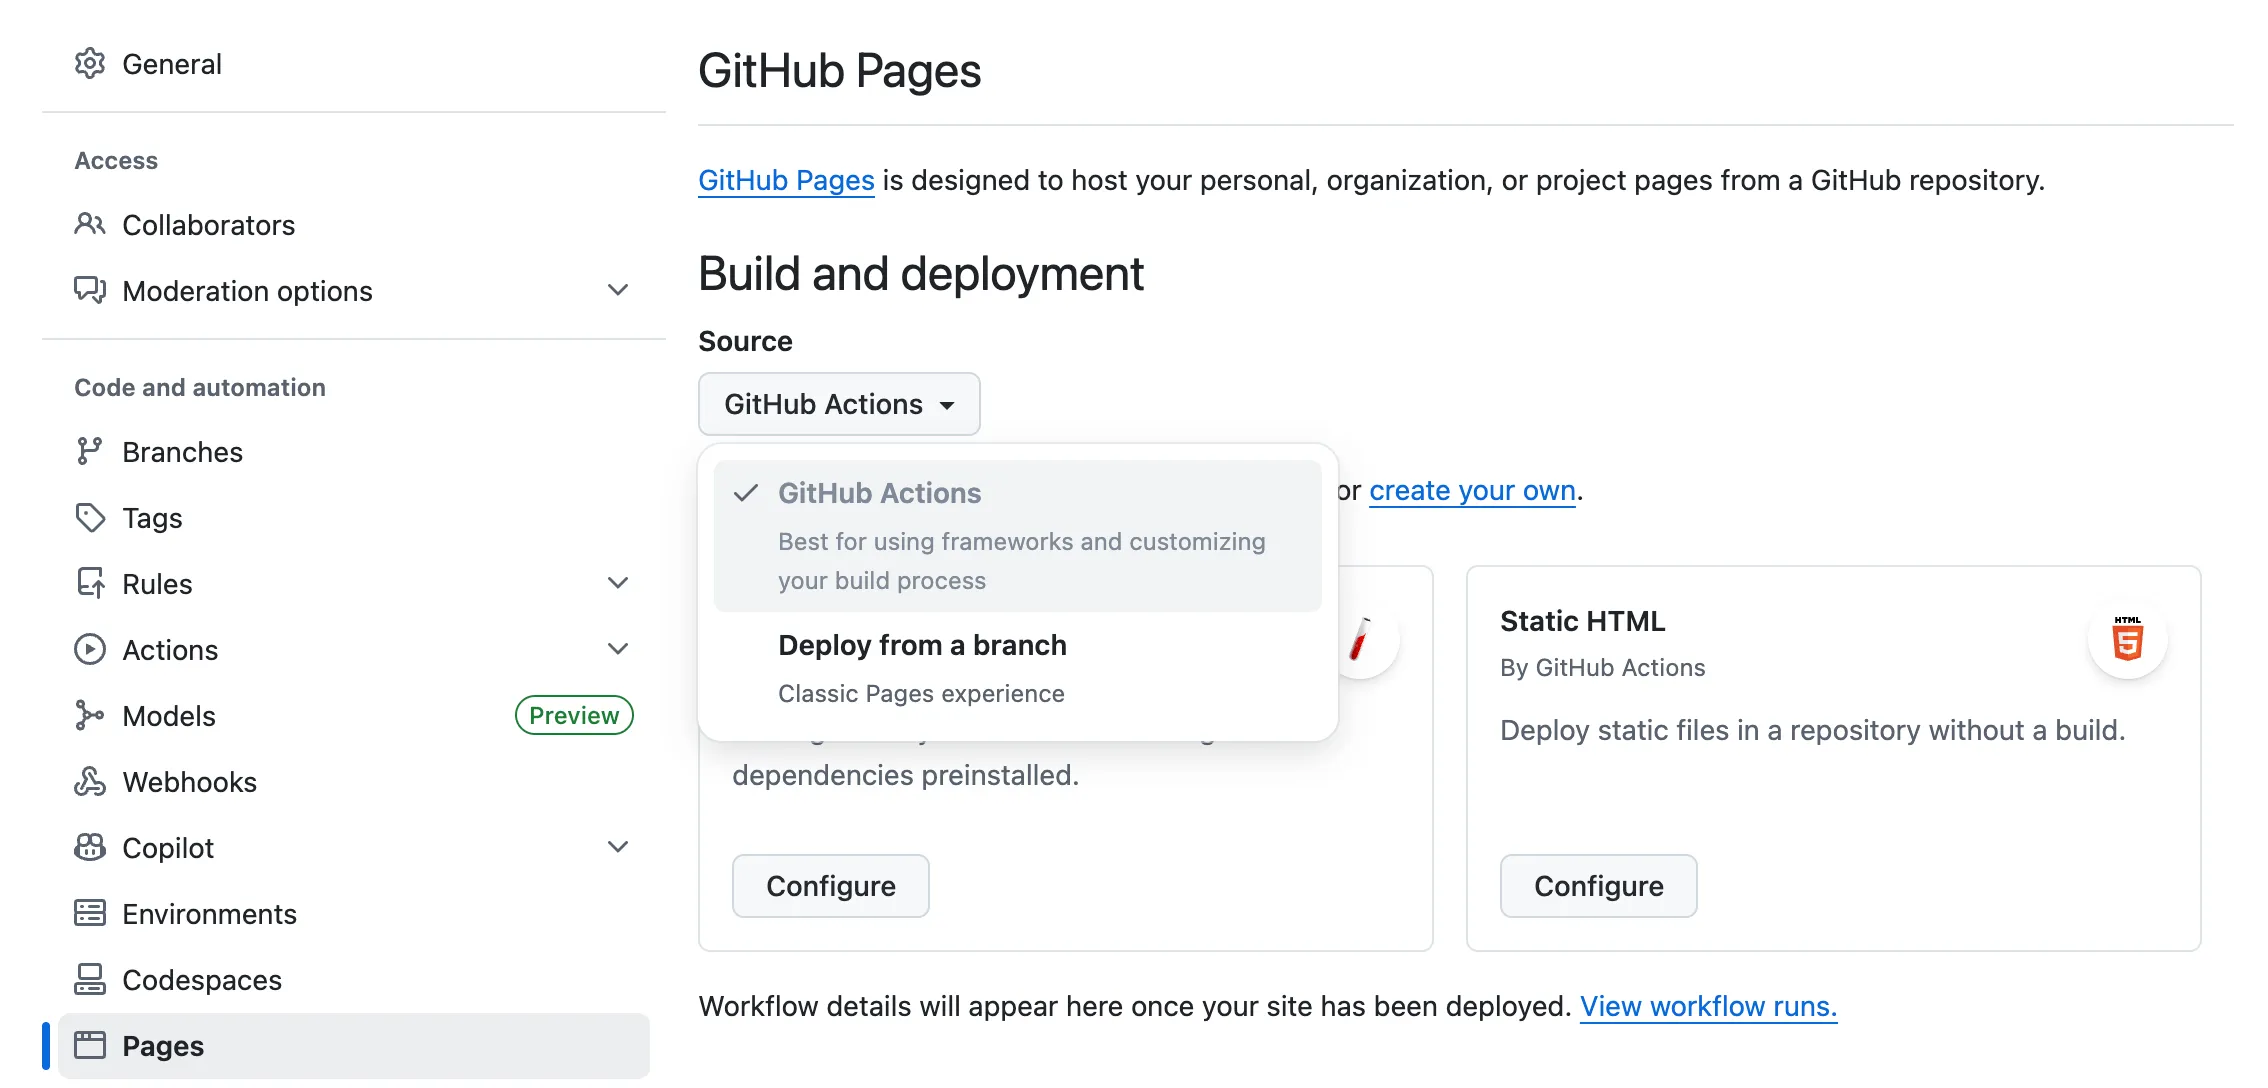
Step 3: Configure Pages
Section titled “Step 3: Configure Pages”-
On the Settings page, find Pages in the left menu
-
Under “Build and deployment”, select GitHub Actions for Source
-
No other configuration is needed; you can return after this
Step 4: Generate a Token
Section titled “Step 4: Generate a Token”You need to generate a GitHub Personal Access Token (PAT) so the Shortcuts can upload notes to your repository.
-
Click Generate new token
-
Fill in the Token info:
- Token name:
Moire Sync(or any name) - Expiration: Recommended to choose 90 days or longer
- Repository access: Select Only select repositories, then choose your Forked Moire repository
- Token name:
-
Configure permissions under Permissions:
Permission Level Description Contents Read and write For uploading note files Workflows Read and write For triggering build processes -
Click Generate token
-
Copy and save the generated Token
Token Format Description
Section titled “Token Format Description”Fine-grained PAT format looks like this:
github_pat_xxxxxxxxxxxxxxxxxxxxxx_xxxxxxxxxxxxxxxxxxxxxxxxxxxxxxxxxxxxxxxxxxxxxxxxxxxxxxxxNext Steps
Section titled “Next Steps”After generating the Token, let’s verify if the deployment was successful!